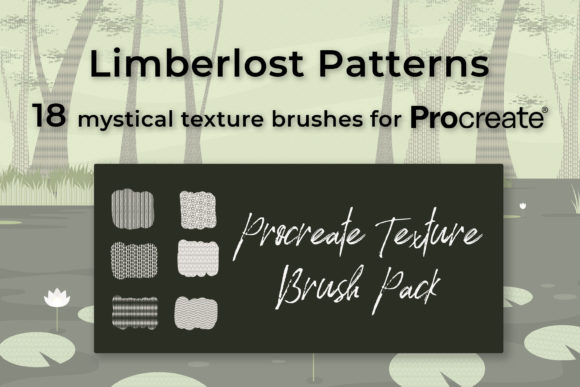
Mastering Texture and Design with Limberlost Patterns Procreate Brushes
Digital illustration has evolved far beyond simple flat colors and basic strokes. Today’s creators, from freelance graphic designers to hobbyist lettering artists, understand that texture is the secret ingredient that transforms a good piece into a compelling one. This is where Limberlost Patterns Procreate Brushes come into play. These tools are designed specifically to inject character, depth, and visual interest into your digital workflow. However, simply downloading a new brush set does not guarantee immediate mastery. Many users stumble not because the tools are flawed, but because they misunderstand how to integrate them effectively into their existing process.
If you are considering adding this brush set to your library, or if you have already purchased it and are struggling to get the results you envisioned, it is crucial to address common pitfalls. By understanding the technical requirements and creative best practices upfront, you can avoid frustration and unlock the full potential of these eighteen unique brushes.
Understanding the Technical Ecosystem
The most frequent mistake beginners make is assuming compatibility across all digital art platforms. It is vital to clarify that Limberlost Patterns Procreate Brushes are exclusive to the Procreate ecosystem. They do not work in Adobe Photoshop, Clip Studio Paint, Affinity Designer, or any desktop-based illustration software. This limitation is not a drawback but a specialization; the brushes are engineered to leverage the specific engine and pressure sensitivity algorithms of Procreate on iPadOS.
To use these brushes effectively, you must have an iPad, an Apple Pencil, or a compatible pressure-sensitive stylus, along with the Procreate app. Without pressure sensitivity, the nuanced variation in line weight and texture density that defines high-quality digital art is lost. If you are using a capacitive stylus without pressure data, you will find the brushes feel flat and unresponsive. Before purchasing or downloading, verify your hardware setup. Investing in a quality stylus is just as important as investing in the brush set itself.
Furthermore, users often overlook the file format. You will receive a digital .BRUSHSET file (containing all 18 brushes) and a .SWATCHES file. These are not image files like JPEGs or PNGs. You cannot "open" them in a photo viewer. You must import them directly into the Procreate Brush Library and Swatches panel. Failing to understand this import process leads many new users to believe their download is corrupted or empty, when in reality, they are simply looking in the wrong place.
The Myth of the "One-Stroke" Solution
A significant misunderstanding among intermediate users is the expectation that a pattern brush will look perfect with a single, casual stroke. While Limberlost Patterns Procreate Brushes are designed to repeat seamlessly, this seamlessness relies on a specific technique: you must not lift your Apple Pencil while drawing the continuous line. If you lift and restart, the pattern may not align perfectly at the junction, breaking the illusion of an infinite texture.
This requires a shift in mindset from "drawing" to "painting." Instead of short, sketchy lines, practice long, confident strokes. If you need to cover a large area, consider using the QuickShape feature or drawing on a separate layer and scaling it up, rather than trying to hand-draw a massive continuous line. This approach saves time and ensures the geometric integrity of the pattern remains intact.
Leveraging Clipping Masks for Non-Destructive Editing
One of the most powerful yet underutilized features in Procreate is the clipping mask, and it is essential for getting the most out of these brushes. A common error is applying texture brushes directly onto the base color layer. This is destructive; if you make a mistake or want to change the intensity later, you have to erase parts of your original artwork, which can degrade quality.
Instead, create a new layer above your base illustration and clip it. Apply the Limberlost Patterns Procreate Brushes on this clipped layer. This allows you to add bold geometric patterns or subtle grain without altering the underlying pixels. You can move the texture around, resize it, or delete it entirely without affecting your main drawing. This non-destructive workflow is critical for professional projects where client revisions are common. It gives you the freedom to experiment with placement and scale without fear of ruining your progress.
Mastering Blend Modes and Opacity
Another area where users often fall short is ignoring blend modes. When you first apply a pattern brush, it may appear too harsh or opaque, overwhelming the underlying colors. The default "Normal" blend mode is rarely the best choice for texturing. To achieve a sophisticated look, you must experiment with modes like Multiply, Overlay, Soft Light, or Color Burn.
For example, using a dark geometric pattern on a light background might look best in Multiply mode, allowing the background color to show through the white spaces of the pattern. Conversely, adding a subtle highlight texture might work better with Screen or Add. Alongside blend modes, adjusting the layer opacity is crucial. Rarely will you want a texture at 100% opacity. Dialing it down to 20–40% often creates that subtle, professional finish that adds depth without distraction.
The included Procreate Swatches file, which features sixteen curated colors, is designed to complement these blend modes. Using these pre-selected colors ensures that your textures harmonize with your overall palette, preventing clashing hues that can make a design look amateurish.
Choosing the Right Brush for the Right Task
With eighteen brushes in the set, decision paralysis can set in. Users often try to force a specific brush to work for every scenario. It is important to categorize the brushes based on their intended use. Some are better suited for lettering projects, adding grit to serif fonts or whimsical flair to script. Others are ideal for background illustrations, providing seamless wallpaper-like textures.
Before starting a project, take ten minutes to test each brush on a blank canvas. Note which ones respond well to light pressure versus heavy pressure. Understand which patterns tile seamlessly over large areas and which are better for small, contained accents. This preliminary exploration saves hours of trial and error during actual production.
Final Considerations for Digital Creators
Integrating Limberlost Patterns Procreate Brushes into your workflow is about more than just adding noise or shapes; it is about enhancing communication through visual depth. Whether you are a marketer creating social media graphics, an educator designing engaging worksheets, or an artist selling prints, texture adds a tactile quality that draws viewers in.
Remember to keep your layers organized. Label your texture layers clearly. Use groups to keep your clipping masks tidy. And always save your work in the native .procreate format to preserve layer editability, rather than flattening everything into a PNG too early in the process.
By avoiding the common mistakes of incompatible hardware expectations, destructive editing habits, and poor blend mode selection, you can elevate your digital art significantly. These brushes are powerful tools, but like any tool, their effectiveness depends on the skill and intention of the user. Take the time to learn the nuances of pressure sensitivity, seamless repetition, and non-destructive workflows. With practice, you will find that these eighteen brushes become indispensable assets in your creative arsenal, helping you produce work that is not only visually striking but also professionally polished.